Now we are going to look at migrating Legacy File Shares into Microsoft Teams using the SharePoint Migration Tool - https://docs.microsoft.com/en-us/sharepointmigration/introducing-the-sharepoint-migration-tool
- OPTIONAL - Configure an Office 365 Groups Naming Policy
- OPTIONAL - Restrict who can Manage who can create Office 365 Groups
- Create our destination Teams - Remember at the moment, secure private channels is due for release this month (September 2019) but is not yet available, therefore if you need to limit visibility with Teams you will need to create a separate Team)
- OPTIONAL - Create and assign a Retention Policy (remember you can only have one Retention Policy per Team therefore if you need different retentions you will need to create different Teams)
- Use the SharePoint Migration Tool - https://docs.microsoft.com/en-us/sharepointmigration/introducing-the-sharepoint-migration-tool to migrate our data into the Team
- Once we have our Data in SharePoint, we will use Auto mapping of Teams within Intune Configuration Policies to populate the users Windows Explorer with their Teams.
Let’s get going.
Office 365 Groups Naming Policy
Download NamingPolicy.ps1 from https://docs.microsoft.com/en-us/office365/admin/create-groups/groups-naming-policy?view=o365-worldwide#how-to-set-up-the-naming-policy-in-azure-ad-powershell
Edit this as per your requirement, in this example, this has been configured with $PrefixSuffix = "GRP_[GroupName]"
$BlockedWords = "<WordList>"
$PrefixSuffix = "GRP_[GroupName]"
Connect-AzureAD
try
{
$template = Get-AzureADDirectorySettingTemplate | ? {$_.displayname -eq "group.unified"}
$settingsCopy = $template.CreateDirectorySetting()
New-AzureADDirectorySetting -DirectorySetting $settingsCopy
$settingsObjectID = (Get-AzureADDirectorySetting | Where-object -Property Displayname -Value "Group.Unified" -EQ).id
}
catch
{
$settingsObjectID = (Get-AzureADDirectorySetting | Where-object -Property Displayname -Value "Group.Unified" -EQ).id
}
$settingsCopy = Get-AzureADDirectorySetting -Id $settingsObjectID
$SettingsCopy["PrefixSuffixNamingRequirement"] = $PrefixSuffix
$SettingsCopy["CustomBlockedWordsList"] = $BlockedWords
Set-AzureADDirectorySetting -Id $settingsObjectID -DirectorySetting $settingsCopy
(Get-AzureADDirectorySetting -Id $settingsObjectID).Values
We will then use the following PowerShell script to configure our Groups Naming Policy
#Set-ExecutionPolicy
Set-ExecutionPolicy Unrestricted -Scope Process -Force
#Uninstall the Existing AzureAD Module as the preview module is required
Uninstall-Module AzureAD
#Import required Module and connect to Azure Active Directory
Install-Module AzureADPreview -AllowClobber -Force
Import-Module AzureADPreview -Force
#Connect-AzureAD
Connect-AzureAD
#Set the naming Policy using the PS script provided by MS at https://docs.microsoft.com/en-us/office365/admin/create-groups/groups-naming-policy?view=o365-worldwide#how-to-set-up-the-naming-policy-in-azure-ad-powershell
#This has been configured with $PrefixSuffix = "GRP_[GroupName]" - Remember to run this form the directory where you saved NamingPolicy.ps1
.\NamingPolicy.ps1
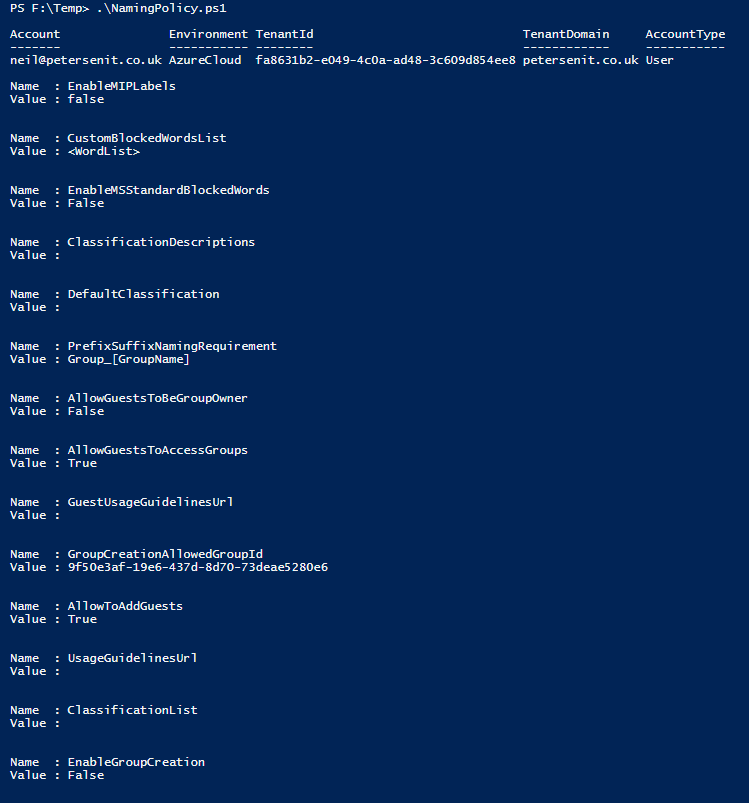
#Confirm the naming policy settings have taken affect
$Setting = Get-AzureADDirectorySetting -Id (Get-AzureADDirectorySetting | where -Property DisplayName -Value "Group.Unified" -EQ).id
$Setting.Values

As you can see the PrefixSuffixNamingRequirement is now configured as Group_[GroupName]
Restrict who can Manage who can create Office 365 Groups
This process is detialed here - https://docs.microsoft.com/en-us/office365/admin/create-groups/manage-creation-of-groups?view=o365-worldwide as it’s not a requirement I’m not going to implement here.
Create our destination Teams
Create our destination Teams
Now we are going to create our destination Teams site, to do so I’ve used a PowerShell command from JiJi Technologies (https://jijitechnologies.com/blogs/create-teams-microsoft-teams-powershell)
First of all we need to create a CSV file to use as the input. This must have the following headers:
TeamsName,TeamType,ChannelName,ChannelDescriptions,Owners,Members
Then populate your CSV as required (If you want to create just team with General channel alone, don't specify channel names, just leave it as empty):
Here is the raw data of the above example:
TeamsName,TeamType,ChannelName,ChannelDescriptions,Owners,Members
GROUP_NewTeamFromPowerShell1,Public,Channel1,Channel 1 Description,Neil@petersenit.co.uk,Neil@petersenit.co.uk
GROUP_NewTeamFromPowerShell2,Private,Channel1;Channel2,Channel 1 Description;Channel 2 Description,Neil@petersenit.co.uk,Neil@petersenit.co.uk;Source.User0007@petersenit.co.uk
Run the following PowerShell to create your teams (remember to watch out for 2FA or conditional access policies which may be restricting access)
Install-Module -Name MicrosoftTeams
Import-Module MicrosoftTeams -NoClobber -Force
function Create-Channel
{
param (
$ChannelName,$GroupId,$ChannelDescriptions
)
Process
{
try
{
$teamchannels = $ChannelName -split ";"
$ChannelDescriptions = $ChannelDescriptions -split ";"
if($teamchannels)
{
for($i =0; $i -le ($teamchannels.count
- 1) ; $i++)
{
New-TeamChannel -GroupId $GroupId -DisplayName $teamchannels[$i] -Description $ChannelDescriptions[$i]
}
}
}
Catch
{
}
}
}
function Add-Users
{
param(
$Users,$GroupId,$CurrentUsername,$Role
)
Process
{
try{
$teamusers = $Users -split ";"
if($teamusers)
{
for($j =0; $j -le ($teamusers.count
- 1) ; $j++)
{
if($teamusers[$j] -ne $CurrentUsername)
{
Add-TeamUser -GroupId $GroupId -User $teamusers[$j] -Role $Role
}
}
}
}
Catch
{
}
}
}
function Create-NewTeam
{
param (
$ImportPath
)
Process
{
Import-Module MicrosoftTeams
$cred = Get-Credential
$username = $cred.UserName
Connect-MicrosoftTeams -Credential $cred
$teams = Import-Csv -Path $ImportPath
foreach($team in $teams)
{
$getteam= get-team |where-object { $_.displayname -eq $team.TeamsName}
If($getteam -eq $null)
{
Write-Host "Start
creating the team: " $team.TeamsName
$group = New-Team -displayname $team.TeamsName
-Visibility $team.TeamType
Write-Host "Creating
channels..."
Create-Channel -ChannelName $team.ChannelName
-GroupId $group.GroupId
-ChannelDescriptions $team.ChannelDescriptions
Write-Host "Adding
team members..."
Add-Users -Users $team.Members
-GroupId $group.GroupId
-CurrentUsername $username -Role Member
Write-Host "Adding
team owners..."
Add-Users -Users $team.Owners
-GroupId $group.GroupId
-CurrentUsername $username -Role Owner
Write-Host "Completed
creating the team: " $team.TeamsName
$team=$null
}
}
}
}
Create-NewTeam -ImportPath "F:\Temp\NewTeams.csv"
Create and assign a Retention Policy
This can be completed via PowerShell using the New-TeamsRetentionCompliancePolicy (https://docs.microsoft.com/en-us/powershell/module/exchange/policy-and-compliance-retention/new-teamsretentioncompliancepolicy?view=exchange-ps) and Set-TeamsRetentionCompliancePolicy (https://docs.microsoft.com/en-us/powershell/module/exchange/policy-and-compliance-retention/set-teamsretentioncompliancepolicy?view=exchange-ps) but to be honest I haven’t got time at the moment and as I’m only creating a couple of TEams I’ll do this through the Security and Compliance Centre

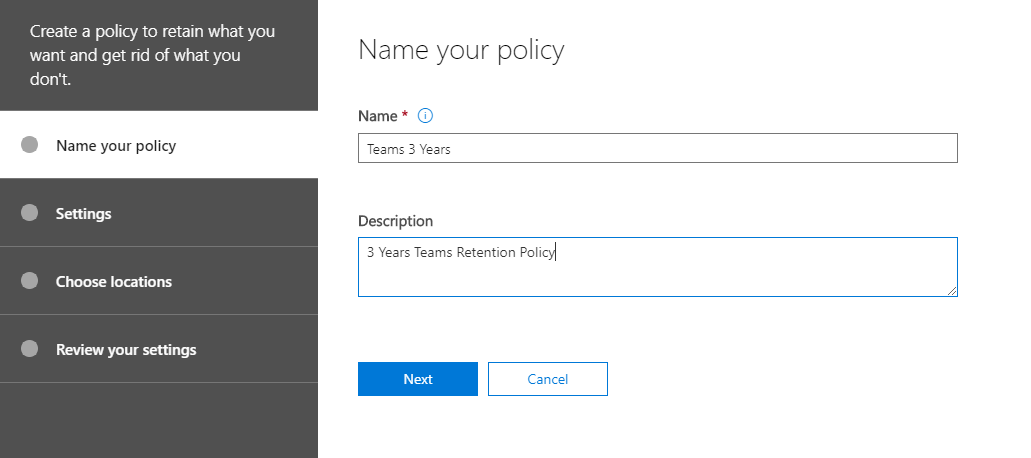
Click on Create, configure the Name and Description:
Configure your required Retention settings:

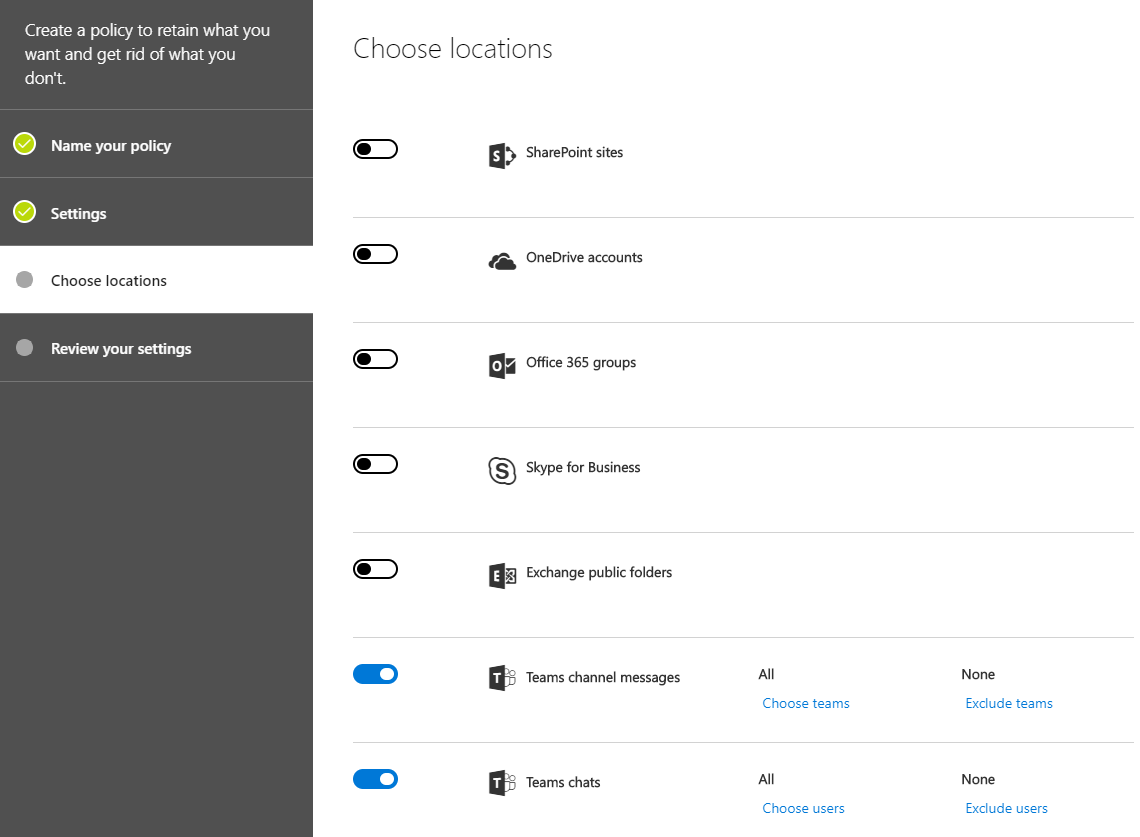
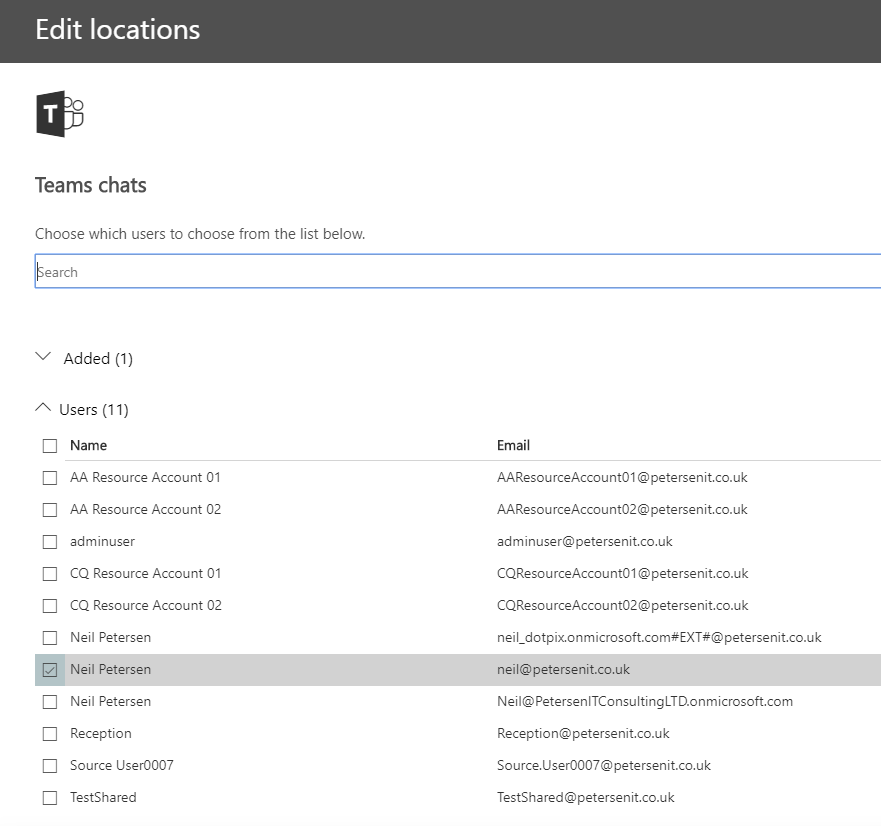
Configure the locations as Teams channel message and Team Chats:
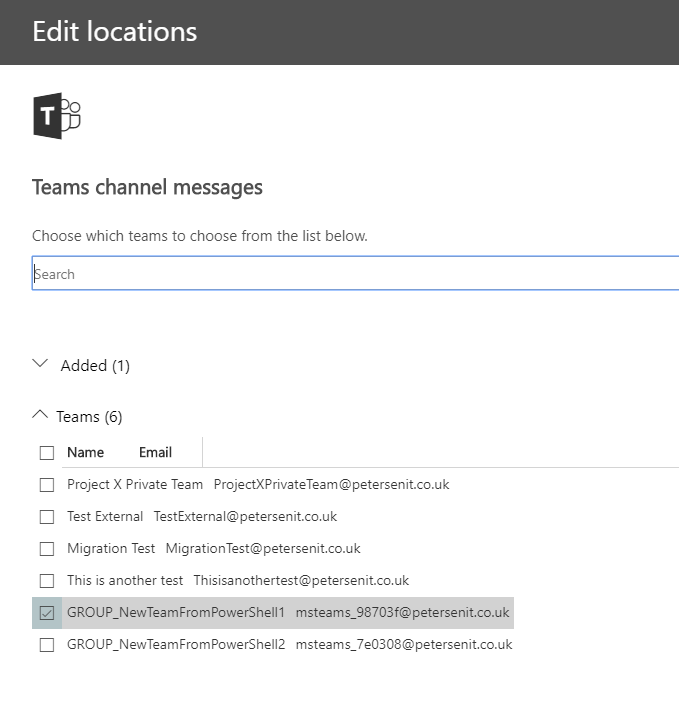
Select the Team and any required Users:
Confirm the group has been added and select Done:

Review you policy and click Create this policy:
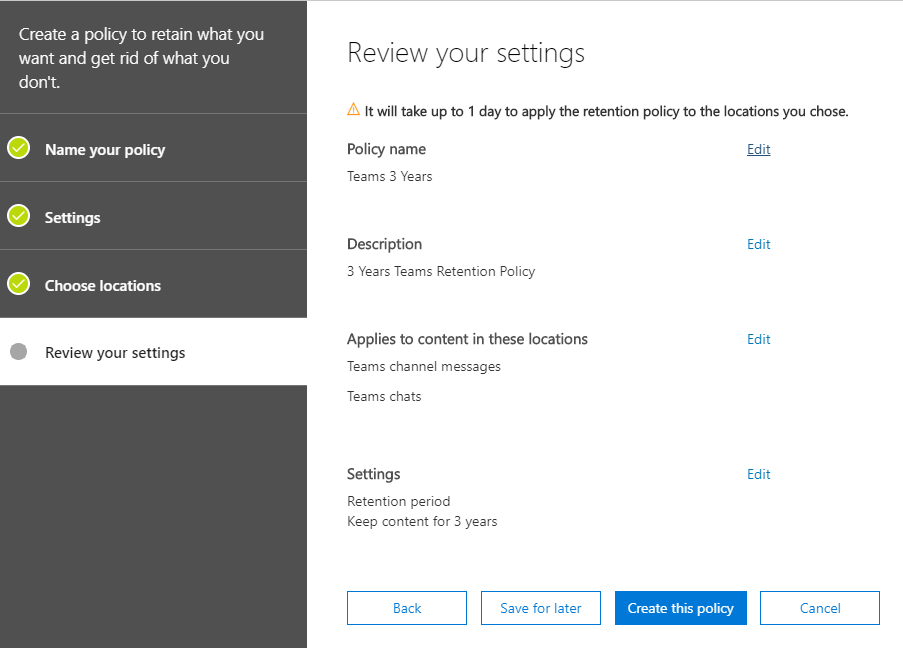
Note the warning that this may take up to 1 day to apply.
Click on Create and you will have your Retention Policy created:

Use the SharePoint Migration Tool to migrate data
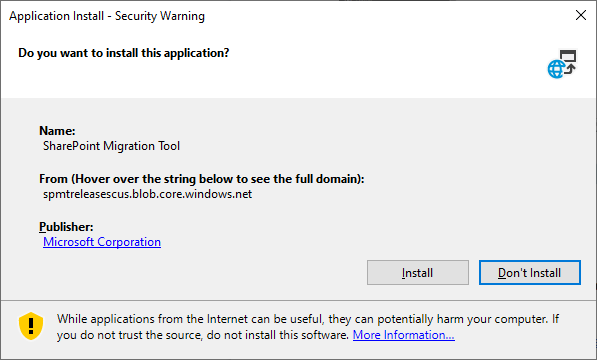
To get started and download the SharePoint Migration Tool (I used Version 3.1.110.1) from Microsoft - http://spmtreleasescus.blob.core.windows.net/install/default.htm
Click Install
Click Install

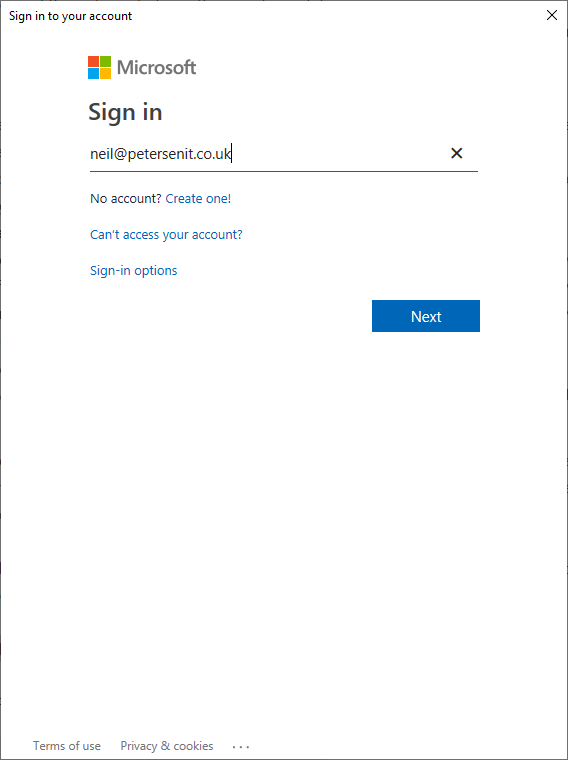
Sign in with your global admin account:

Select File Share

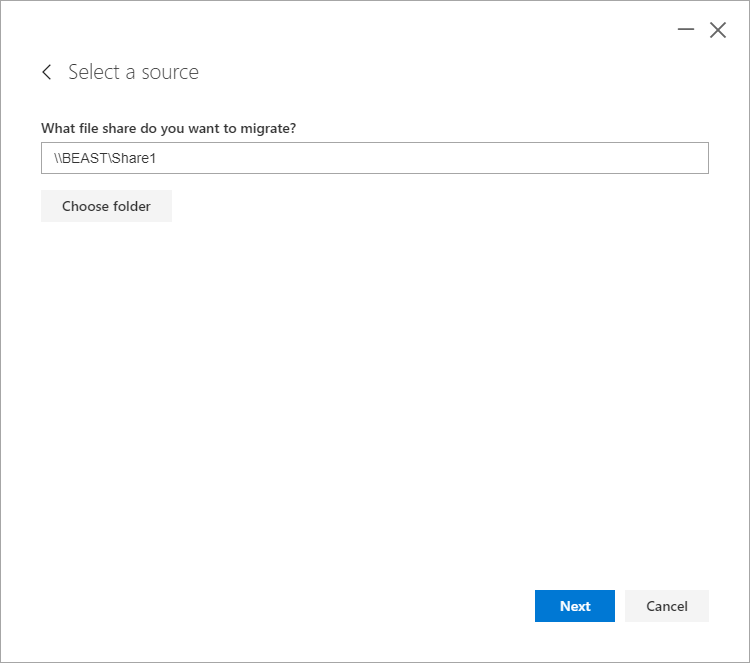
Enter your destination Team address (you can get this by using Teams and then clicking the open in SharePoint link)

Select the document library

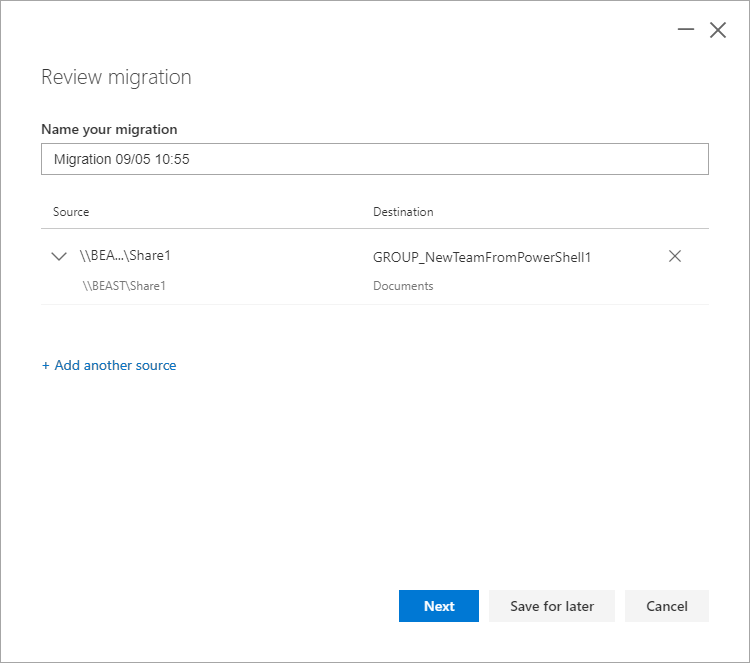
Review the migration to confirm you have this set as required:
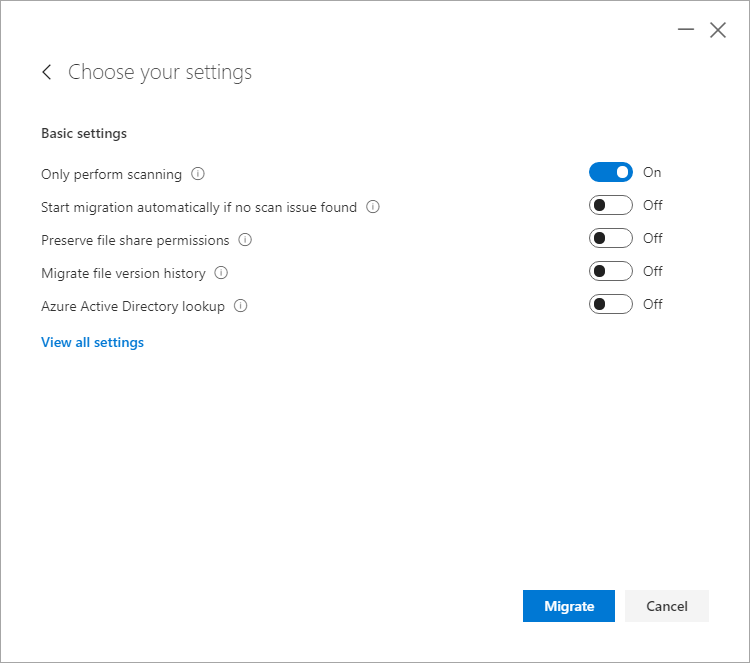
First of all I’m going to Only to perform scanning to allow me to review any errors I might receive:
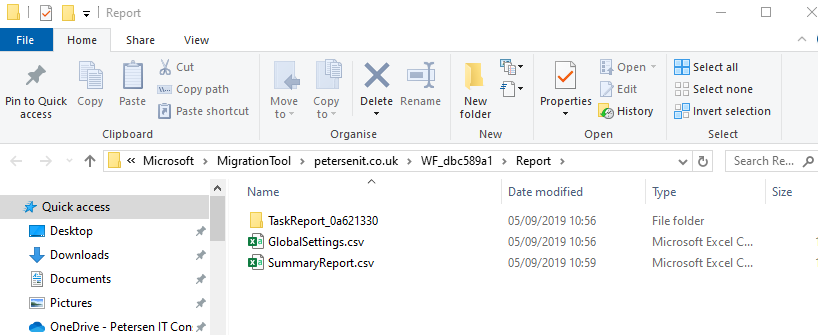
Clicking on the ‘Migration details’ provides me with reports about my migration:
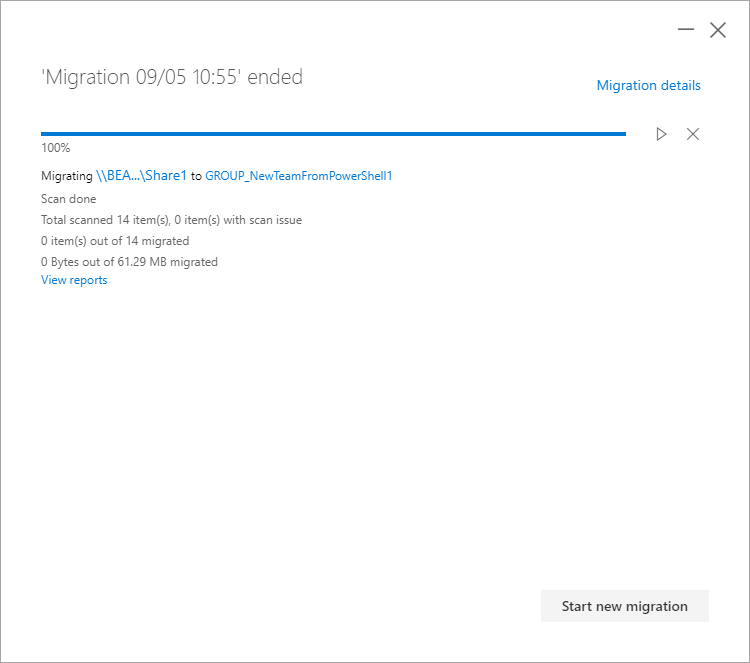
I can now perform my migration safe knowing that I’m not going to receive any issues:

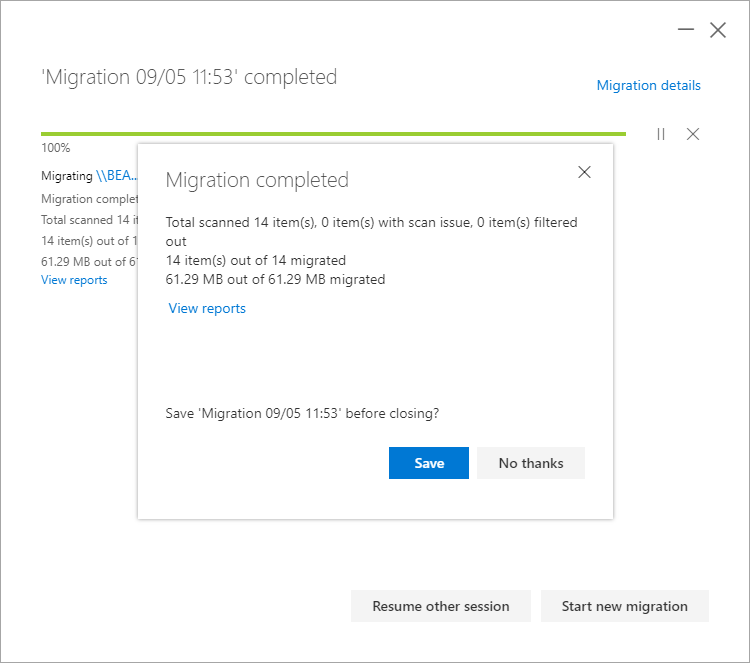
And my migration is completed:

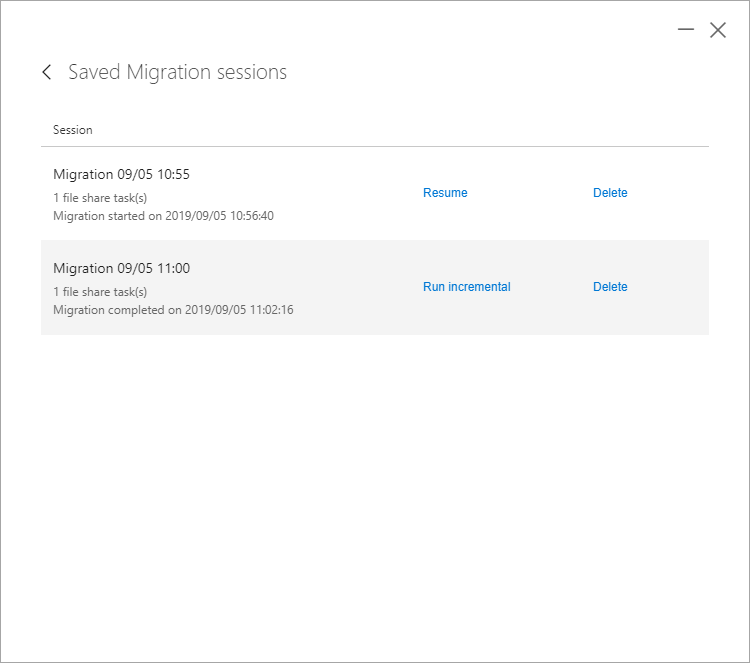
You can also save the migration to allow you to perform incremental migrations at a later date, when you open the tool next time you will see these saved:

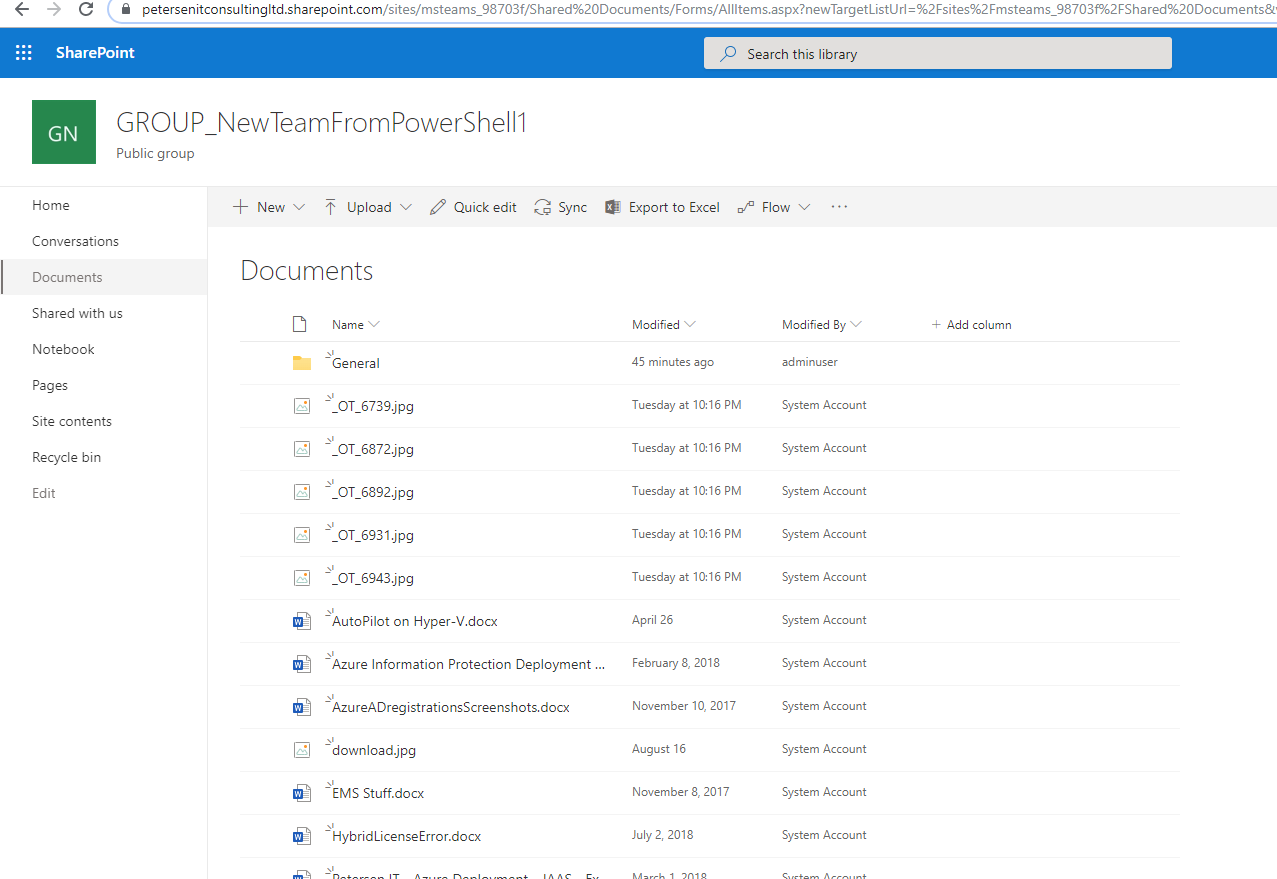
There is one major downfall in using this method. That is by default when using the method above, This only allows you to select the ‘Documents’ library and this is not where the General documents are stored. Therefore after you migration your users will not see these within the Teams client for example:

If we open this in SharePoint we can see that the migrated data is outside of the ‘General’ folder and therefore not available to the users through the client.
“How do we get around this?” We use a CSV file to specify the migration details (https://docs.microsoft.com/en-gb/sharepointmigration/how-to-format-your-csv-file-for-data-content-migration)
Raw data of the above is:
\\BEAST\Share1,,,https://petersenitconsultingltd.sharepoint.com/sites/msteams_98703f,Documents,General
Start a new migration and select JSON or CSV:

Enter the path to your CSV file:

Click on Add:

Click Next:
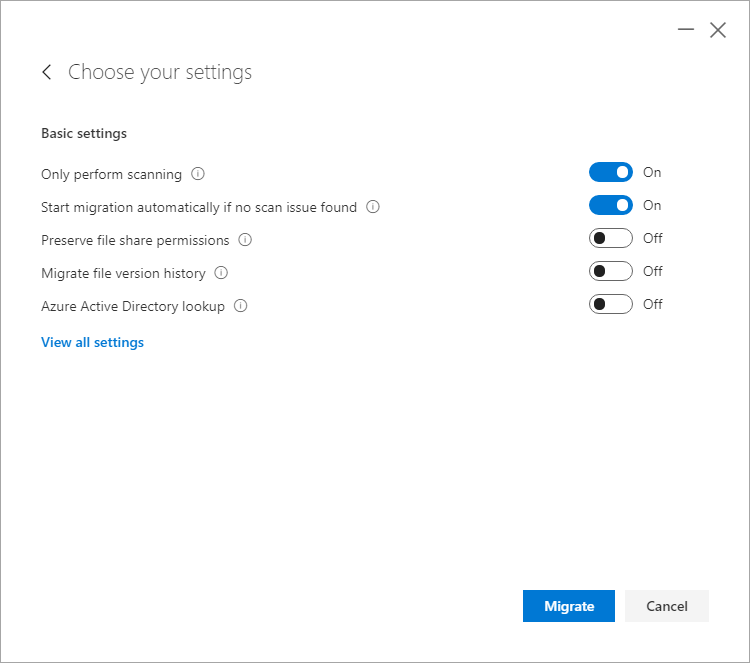
Select your migration options and click Migrate:
Now if we look in our Teams client we can see these have been correctly migrated into the ‘General’ folder.

Auto mapping of Teams
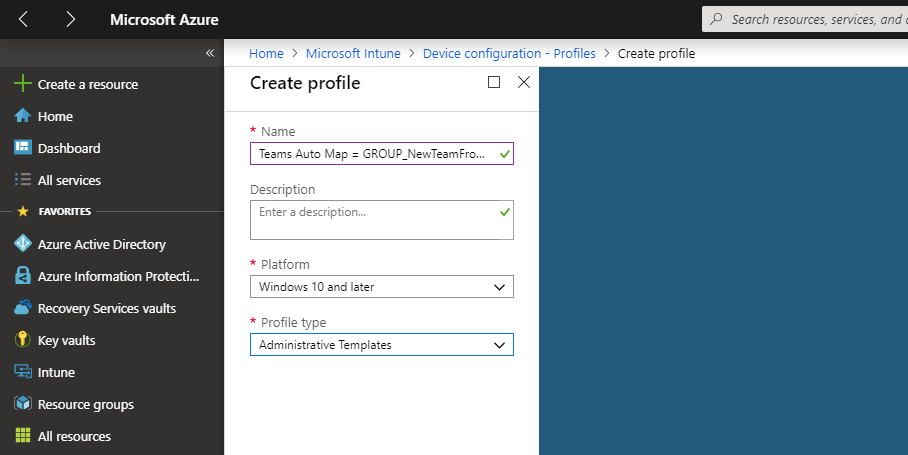
Now we have our data in Team we are going to use a Configuration Profile within Intune to Automap the Team into Windows Explorer for our users.
Within Intune Create a new Configure Profile:
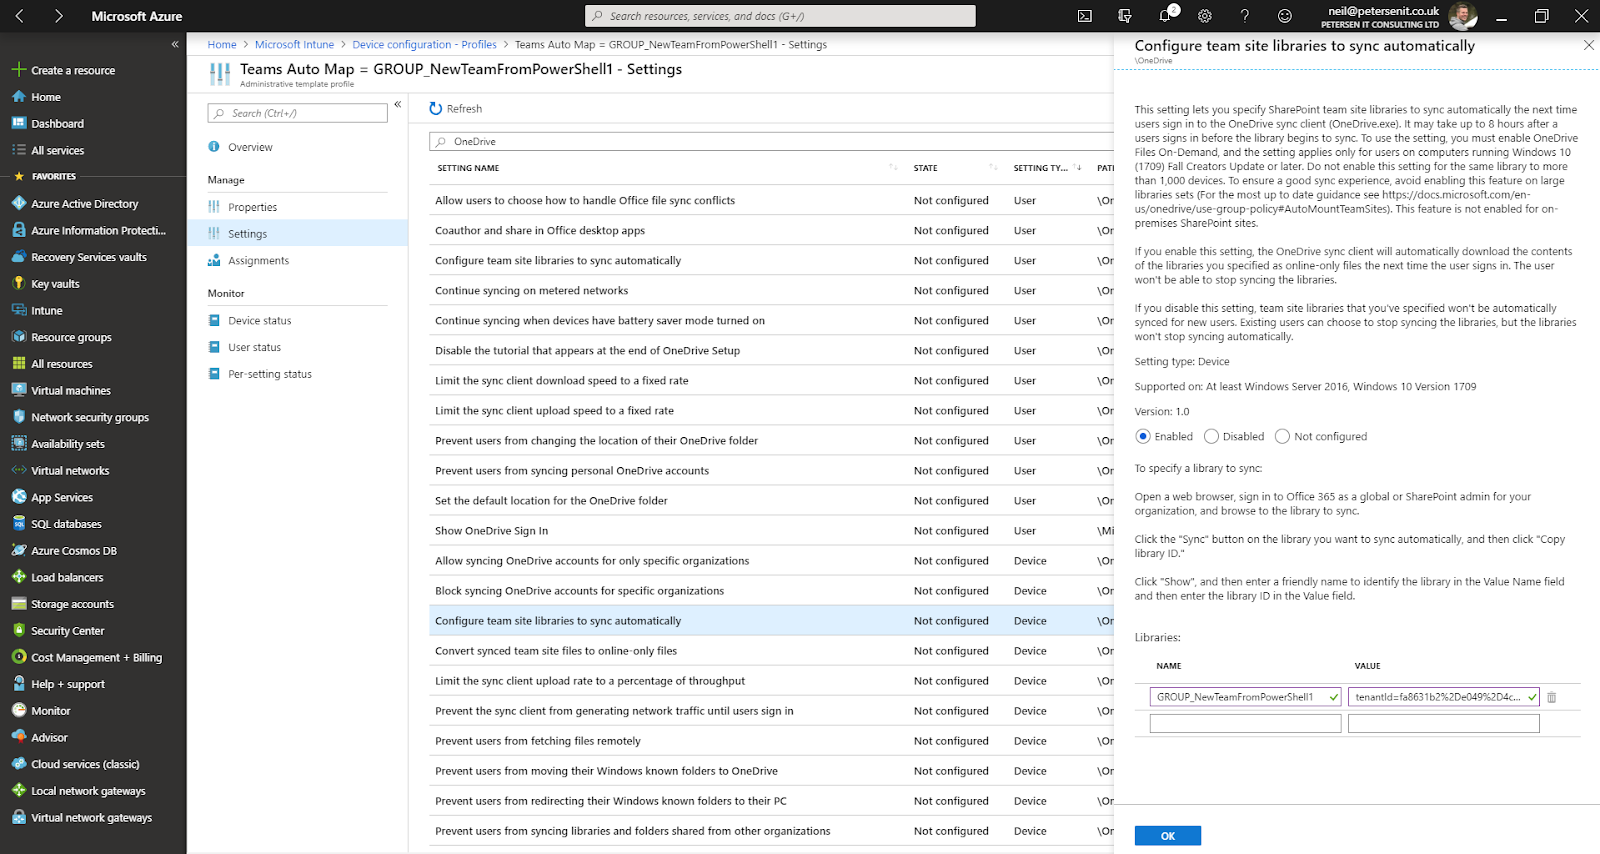
Configure the ‘Configure team site libraries to sync automatically’ user setting with the required information which is Name and Value.
Name is just a name (this is not reflected within Windows Explorer)
Value = The Library ID of the Team. To get this browse to the Team in SharePoint and click on the Sync Icon:

Then click on ‘Copy library ID’
If we open Notepad we can paste the details into here (word wrap is enabled here and it will be on a single line):

tenantId=fa8631b2%2De049%2D4c0a%2Dad48%2D3c609d854ee8&siteId=%7B9f61241f%2D5a29%2D4fc4%2D8d20%2D97f6c3fb43a7%7D&webId=%7Be4abb80d%2Db729%2D4944%2Dadb2%2D600256c3bc46%7D&listId=%7B02CF859D%2D7448%2D4533%2DBC08%2D15FDCF4226BF%7D&folderId=9a63175d%2D9a8c%2D4ae9%2Db5ab%2D3f1e3afb1f19&webUrl=https%3A%2F%2Fpetersenitconsultingltd%2Esharepoint%2Ecom%2Fsites%2Fmsteams%5F98703f&version=1
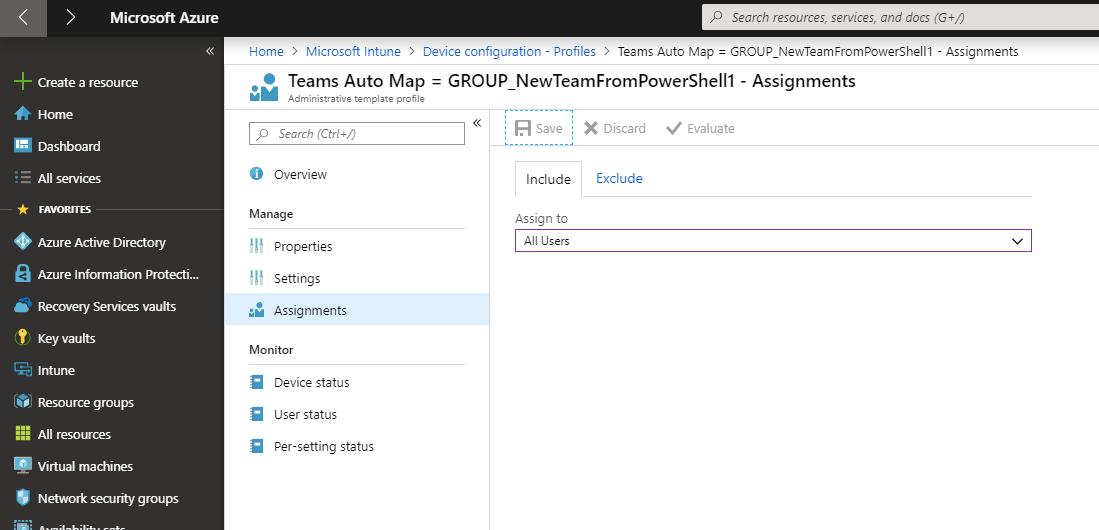
Configure the Assignments (in this example I’ve just assigned to all users):
NOW WAIT!!!!! :(
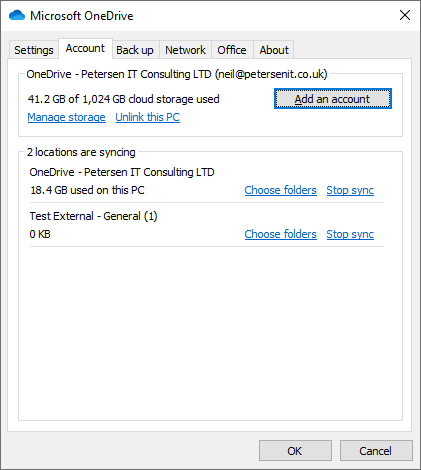
Once applied, this can take upto 8 hours to show one on the users machines. Once applied you will be able to see this in the settings of the OneDrive Client (Test External - General (1) was one I created earlier):
And this will be present in the users’ Windows Explorer:

I hope you have found this useful and it helps you with the migraiton of your File Shares to Teams :)
Comments
Post a Comment